Framework
The four Van Westendorp price points
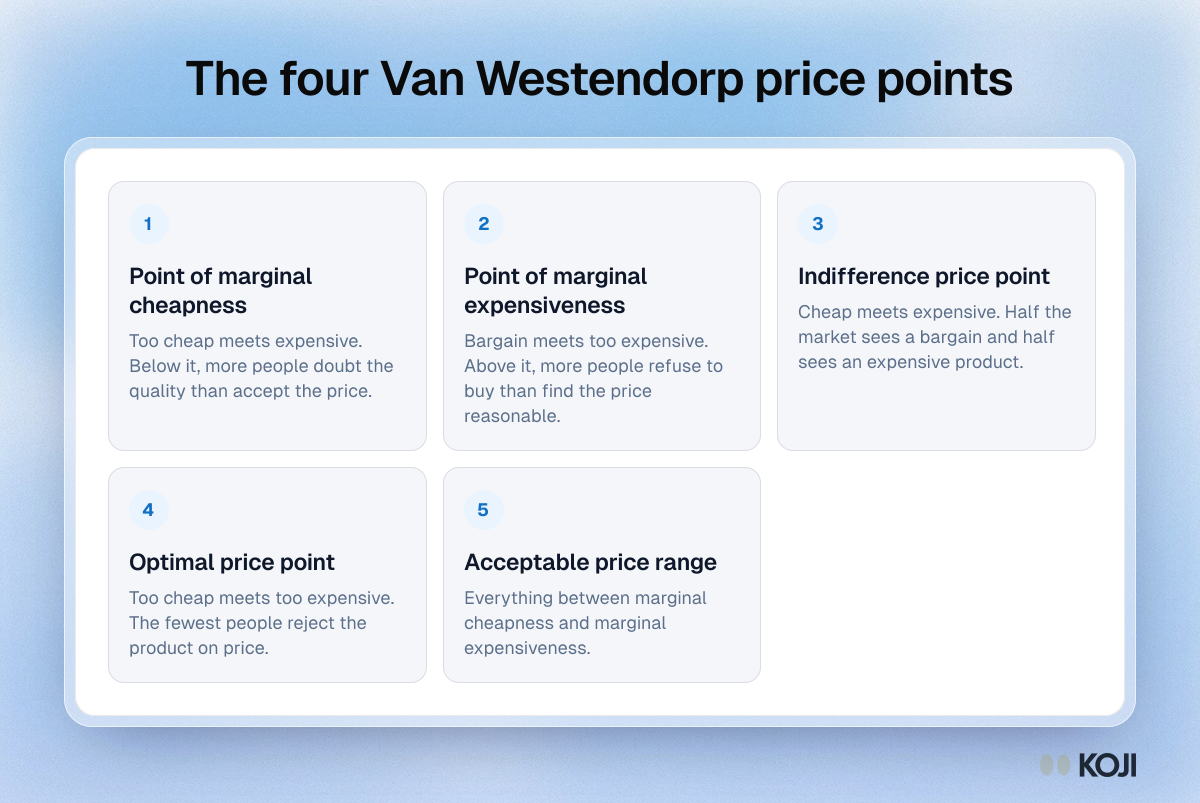
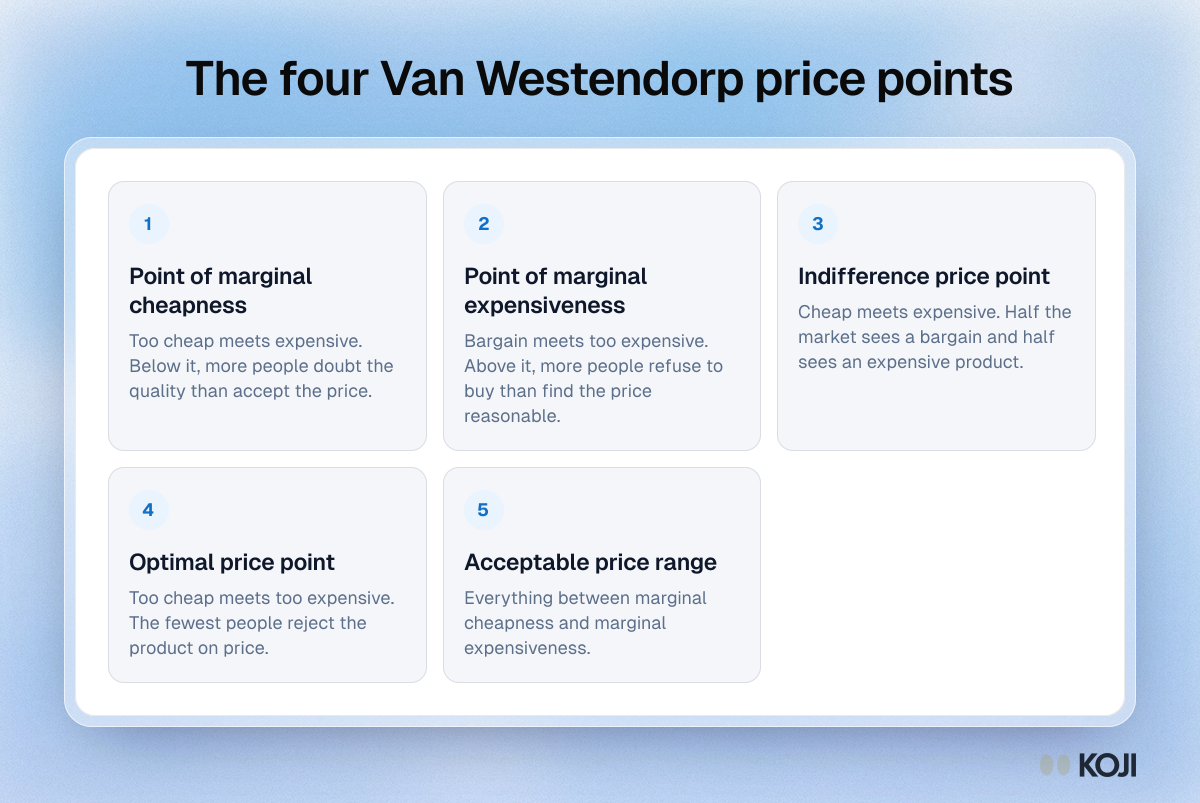
The four price points of the Van Westendorp Price Sensitivity Meter and the acceptable price range between them, with the pair of curves that crosses at each one. Use it to read a PSM chart or to explain the result to people who were not in the study. Koji can run the four price questions as an interview and ask why each person picked their number.
Where this appears
What's in this framework
- Point of marginal cheapness: Too cheap meets expensive. Below it, more people doubt the quality than accept the price.
- Point of marginal expensiveness: Bargain meets too expensive. Above it, more people refuse to buy than find the price reasonable.
- Indifference price point: Cheap meets expensive. Half the market sees a bargain and half sees an expensive product.
- Optimal price point: Too cheap meets too expensive. The fewest people reject the product on price.
- Acceptable price range: Everything between marginal cheapness and marginal expensiveness.
Use this image
Free to use in your docs, decks and posts under CC BY 4.0, as long as you credit Koji with a link to this page. To embed it, paste this into your page:
html
<a href="https://www.koji.so/visuals/van-westendorp-four-price-points"><img src="https://www.koji.so/visuals/van-westendorp-four-price-points/van-westendorp-four-price-points.png" alt="Framework of the Van Westendorp price points: marginal cheapness, marginal expensiveness, indifference and optimal price, plus the acceptable range." width="1200" height="803" /></a>
<p>Source: <a href="https://www.koji.so/visuals/van-westendorp-four-price-points">The four Van Westendorp price points</a>, Koji</p>